Feeds:
Posts
Comments

Archive for the ‘studio’ Category

Quilting Arts Open Studio

I took a video of my studio yesterday. Big surprise, I had a lot to say, so the video is split in 2:

Here’s a link to a tutorial on how to recover an office chair like mine.

Here’s a link to a tutorial on how we built mydouble sewing machine table.

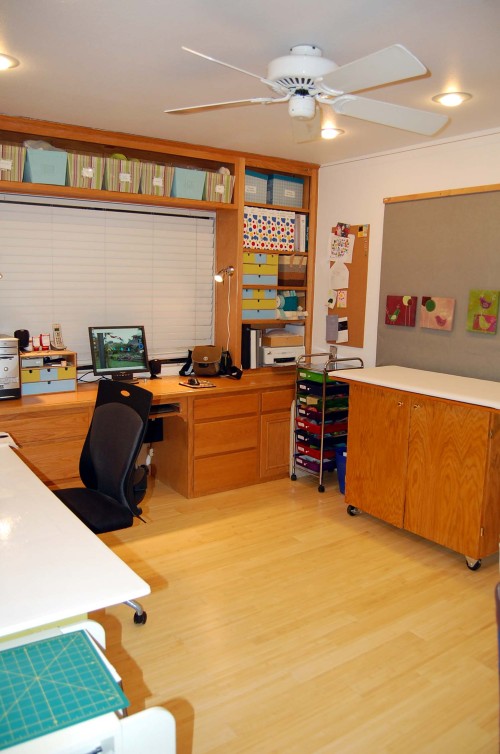
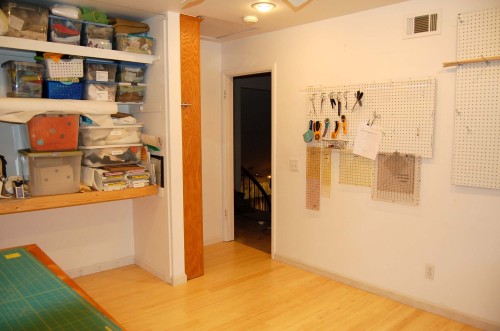
For those who don’t have the time to watch the video, I also have a pictorial tour of my studio from right after we put new flooring in at Christmas time CLICK HERE to get the text and more images..

studio-dec-08-006400

studio-dec-08-008400

studio-dec-08-007400

Thanks SO MUCH for stopping by!

Read Full Post »

Open Studio Day!

The folks over at Quilting Arts/Cloth, Paper, Scissors are hosting an open studio event this coming weekend. They publish a couple of drool=worthy issues featuring artists studios, and want to celebrate the release of the current one by getting folks the world round to open up THEIR studios! What fun…I’ve showed off my studio before, but I’m going to use this opportunity to post my 1st video!

image

I’m having a bit of technical difficulty getting it uploaded, and I see that lots of folks are dropping be and looking for my studio, so until I get the video problem fixed I also have a pictorial tour of my studio from right after we put new flooring in at Christmas time CLICK HERE to get the text and more images..

studio-dec-08-006400

studio-dec-08-008400

studio-dec-08-007400

Thanks SO MUCH for stopping by!

Read Full Post »

Busy Day

I spent several hours today meeting with the 3 other members of the operating board for an art show we’re planning for november. We started “Artists for a Cause” about 2 years ago, with the intention of donating 20% of our proceeds to a local Redlands charity each year. Our 1st year we were a group of 6, last year we added 3 more for a total of 9, and now, we’re really expanding and will have a total of 14 local artists, as well as 2-3 Art Students from the University of Redlands. I love working with these ladies, and it feels great to be working for a local cause, but man, planning a show is a LOT of WORK!

I’ve been asked to submit 2 articles on photographing & how I built my light tent, so that’s been another thing on my plate – I sent that off at 9PM tonight, so a big woohoo there! I’ll let you know if/when it’s published

And, Stirling makes the big time again – this time, he’s part of a “pets on furniture” post on Desire to Inspire!

I’m in the throes of dyeing lots of pieces of canvas, so boring pictures there, here’s a picture of me mid-organizing and photographing scarves from the other day, just in case you thought I’m being a slacker!

Habotai_0001

Read Full Post »

Finished & Ready for Creating!

It’s done! I’m all moved in and it is gorgeous! Yes, I know how lucky I am!
studio-dec-08-002400

studio-dec-08-005400

studio-dec-08-006400

studio-dec-08-008400

studio-dec-08-007400

studio-dec-08-010400

studio-dec-08-011400

studio-dec-08-009400

Beyond the general de-cluttering, the only real change in here (besides the new floor & baseboards) was swapping out the mirrored sliding closet doors with these simple white curtains I made from some white cotton twill. Our house has these expensive closet doors in every bedroom – I know they’re supposed to make the room look bigger, but I can tell you that here in the sewing room, they didn’t. Probably because they reflected back all the stuff that was in here and made it look even MORE full of stuff. My 7 year old just walked in here and saw the room for the 1st time with the curtain and immediately said that the room looks bigger!

My main reason for doing it was so I could access the whole closet at once, rather than sliding those darn doors back and forth. Often when I’m ironing I park the iron down on the closet shelf, so I need that area open. I can now fill up the whole of the inside without worrying about how to get to large boxes of things right in the middle!

Enough talking, time to get doing!

Read Full Post »

Floor Finished!

It looks fabulous! And the lighter color really enlarges the space (of course, the lack of stuff in here helps!) Now to bring all the stuff back in!studio-floor-005400
studio-floor-003400
studio-floor-009400

Read Full Post »

I really don’t like not doing things. My definition of a fun vacation is time in a CLEAN ORGANIZED house so I can make some art. God bless my husband, he goes along with my mania…most of the time. Sometimes he even supports it – I got bamboo flooring for my studio for Christmas!!!! And now we’ll install it! Yay! Today I cleared out what I HAD to, and covered everything else with plastic drop cloth. Here are before pix:

studio-001400studio-002400

“But Candy!” you say…”You already have lovely hard floors in there anyway!”

Well, yes & no. Our 1st Christmas here 4 years ago my hubby made me the rolling cutting table on the left in the 1st picture and can lights for Christmas. While we were roaming around in Lowe’s picking up something for the can installation we literally ran into a pile of el-cheapo plastic laminate floor, and we snapped it up and installed it. I works for me – I can roll around and it’s easy to sweep, but we didn’t get the floor level enough when we installed it  – the dip in the floor bothers my husband, plus the floor is breaking up in a couple of places:

studio-003400

So out it goes tomorrow! I think we’ll even install the baseboard when we’re done this time! Also very exciting is the fact that I’ve finally convinced hubby to take the dreaded sliging mirror closet doors out for good. I’m going to hang a curtain instead so I can have access to the whole closet at once when I’m working, and then the curtain will act as a photo backdrop when it’s closed.

Bring on the Advil!

Read Full Post »
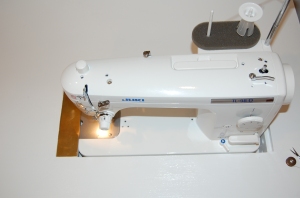
So, the upside of my little business is that I have made enough money to completely cover all my material expenses, plus I’ve been able to purchase a new camera (a Nikon D40) and a new Sewing Machine – a Juki TL-98Q. Yay! But now I needed a table that could fit both machines at once, or one at a time. For 2 reasons, 1) money and 2) function, my DH has made me the perfect sewing machine table!

Tah Dah! As always – click any picture to embiggen!

It is 2' x 6', with an extension hinged across the back to make it a full 4' deep when I want (the extensions that hold that up aren't built yet, but Rome wasn't built in a day either...) It is 28" high with leveling feet that allow up to another 1" in height if needed. There is also a 12" deep shelf running across the back to hold either the machine covers or the machines themselves.

2x4's braced with plywood pieces at the junctions. There is a 12" deep shelf running across the back.

Table frame: 2x4's braced with plywood pieces at the junctions. There is a 12" deep shelf running across the back.

Measuring

Measuring

Holes Cut

Holes Cut

Shelf

Shelf

Lots of drywall screws, counter sunk, then later filled with spackle.

Lots of drywall screws, counter sunk, then later filled with spackle.

The Juki with the brass plate set into the worktop and held in place with some rare earth magnets. I can fit my finger into the fingerhole of the plate on the machine, flip the brass plate over, then access the bobbin area.

The Juki with the brass plate set into the worktop and held in place with some rare earth magnets. I can fit my finger into the fingerhole of the plate on the machine, flip the brass plate over, then access the bobbin area.

Here the brass plate is flipped over - you can see the magnets coutner sunk and plenty of room to access the bobbin.

Here the brass plate is flipped over - you can see the magnets counter sunk and plenty of room to access the bobbin.

Bernina

Bernina sits just proud of the table and the table that came with it covers up the hole. This system worked really well with my old table and saves the $$ for the plexiglass insert. See my July 6 post.

We stapled some velcro ties underneath to control the cords.

We stapled some velcro ties underneath to control the cords.

My DH created a "mini-table" insert for the Bernina hole.
My DH created a “mini-table” insert for the Bernina hole.
A crefully fit plywood top with 2x4 bits underneath. Those are adjustable chair legs crewed into the bottom, so we could get the  top totally flush.

A carefully fit plywood top with 2x4 bits underneath. Those are adjustable chair legs screwed into the bottom, so we could get the top totally flush.

With the "mini-table" in place, I can use the surface for cutting, or it will support a large quilt when I'm quilting.

With the "mini-table" in place, I can use the surface for cutting, or it will support a large quilt when I'm quilting.

Even more pictures of this whole process are here…if you need to show the handy person in the house “Just how Candy’s husband did it” so they too can build you the perfect sewing table!
With the addition of one more set of drawers for my fused fabric little bits my studio works very well!

With the addition of one more set of drawers for my fused fabric little bits my studio works very well!

This new table is a bit narrower, so when I open up the cutting table all the way, there's room to walk all the way around.

This new table is a bit narrower, so when I open up the cutting table all the way, there's room to walk all the way around.

These drawers were repurposed to hold all my thread.

These drawers were repurposed to hold all my thread.

I can also create an ironing surface by placing my large board across a small set of rolling shelves (balance carefully) Then I can cut & press side by side.

I can also create an ironing surface by placing my large board across a small set of rolling shelves (balance carefully) Then I can cut & press side by side.

I always enjoy seeing where people work, so I’m glad that 1) I’ve got such a great place to work and 2) that I can show it off to you! This is not a large room, but with most things on wheels, I can reconfigure it depending on how I need the space! This is working really well for me.

Read Full Post »

So, my DH is buidling me a new sewing machine table. I thought I’d recap my older ones and then provide a tutorial of sorts on how he built the new one. This post I’ll give a tour of the studio I had set up in a bedroom back when we lived in a 1930’s cape in newark, OH. Even though things were a bit awkward because of sloped ceilings, I loved this room. I’ve posted pix of this space in a gallery format below, click on each picture for a detailed description.

When we moved to CA 4 years ago, I again had a bedroom to call my own, but it was much smaller, so we’ve had to make new furniture for sewing & cutting. Luckily the bedroom came with a built-in desk with lots of bookshelves, so I had some great storage right from the get go. But that’s for another post!

Read Full Post »